We used to bring back tons of souvenirs from our travel. From Kenya, we came back with 20 kilos (40 pounds!) of surplus luggage: soap stone everything and wood carving were filling up every space in our suitcases! From Mauritius, we bought, amongst other things, Frangipani perfume which turned out to be fake. When going to Tunisia, in December, we thought it was a good idea to do our Christmas shopping… well it wasn’t!
Nowadays, when traveling, we very much limit the stuff we buy. It’s got to be useful and very unique, for us to consider purchasing it.
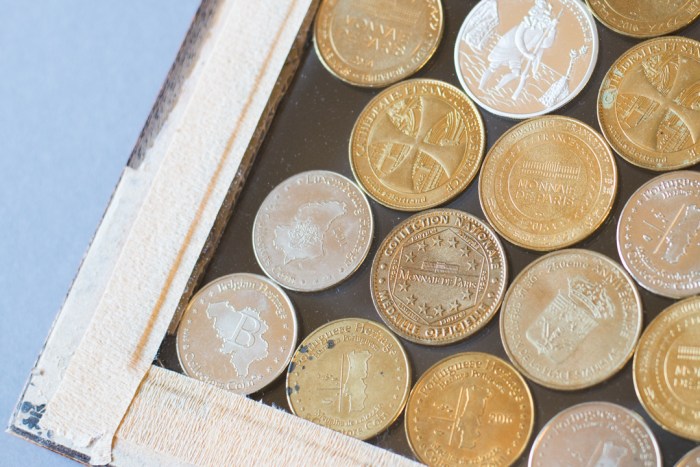
However, there is one thing we still buy regularly and it is souvenir coins. I’m not even sure why. What I’m sure off, is that, we are like children in front of a candy store, every time we see one of those vending type machines which distribute them!
Our collection built up quickly and I recently wanted to find a way to display them. I didn’t want to keep them in in box, no matter how fancy it could be. I certainly didn’t want to keep them in plastic sheets in a binder, you know the same type that are used for stamps. Bulky display of some sort? No way either. Damaging them by glueing them or piercing them, not an option. But I was a bit stuck!
Thankfully Pinterest came to the rescue!! It’s quite amazing how inspiring Pinterest can be, sometimes. A place where you pretty much can find anything and everything.
So I saw on Pinterest that people were putting change from countries they had traveled to, in frames with some pictures, bills, and other small souvenirs.
That was it, I knew, I wanted to frame those coins! By framing them, they could be on display and we could see them. It’s kind of a space saver too because the frame just hangs there, it’s not in the way of anything. The coins don’t get dusty, you can’t touch them so no cleaning required. And I must add, it’s a great conversation starter!
However, I wanted to be able to see the back of the coins as well as the front. Not needed everyday, but still. Some of those coins are just as beautiful in the back as they are in the front. And sometimes we can’t remember when and where they came from and the back provides the answers.
So this is what I did and if you want to do the same, here is a 7 steps guide to frame coins!
1 – Go to a thrift store near by and buy 2 identical frames with a glass top. You only need one… Do make sure the hooks on the frame is sturdy enough. Coins weight far more than a single picture.

2 – Take both frames apart.
3 – Give the 2 glass a good clean! A step absolutely required!
4 – Put one of the glass back in one of the frames.
4 – Cut little pieces of thin cardboard to put in the left & right sides and bottom of the frame. This is to make sure the coins appear full and are not hidden by the frame. I can’t tell you exactly what you will need, it depends of your frame. The only thing I can mention is that the cardboard needs to have the same thickness as the coins, or your coins will go loose and fall.
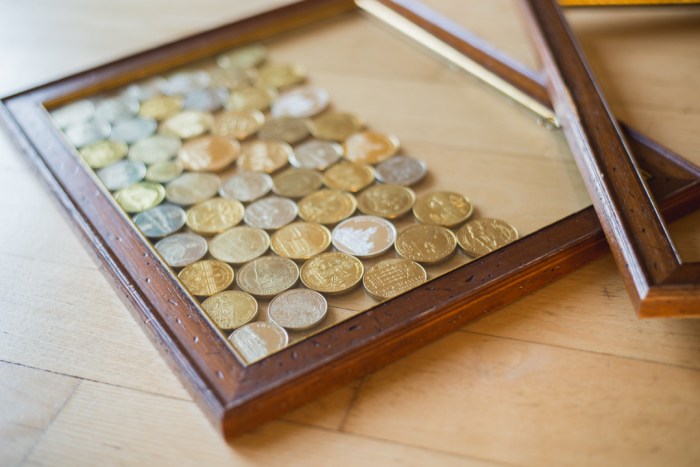
5 – The fun begins: Start placing the coins and played around to find them a good position.
6 – Put the second glass on top of the coins and lift the frame while holding everything to make sure the coins will stay in place. Since of my coins was thicker than the others, it all went to hell! 😉 I removed it, repeated step 5 & 6 and it was all good!
7 – Taped the 2nd glass to the frame and admired the result!!
I will probably use a different sort of tape, or use tiny nails of some sort to attach the glass in the future, but since I realized we had too many coins for one frame (I don’t want it to be full) and too little so far for 2, I will wait a bit to do so.
When I start the second frame, I will have to do what I tried to avoid by buying 2 frames: go to the hardware store to ask them to cut some bran new glasses for me. No big deal. You can certainly add this step if you only have one frame to start with.
So here you have a 7 steps guide how to frame coins! It works with chips, tokens and so forth but the key is that they all have the same thickness. If not, you will probably need to glue them in the back.
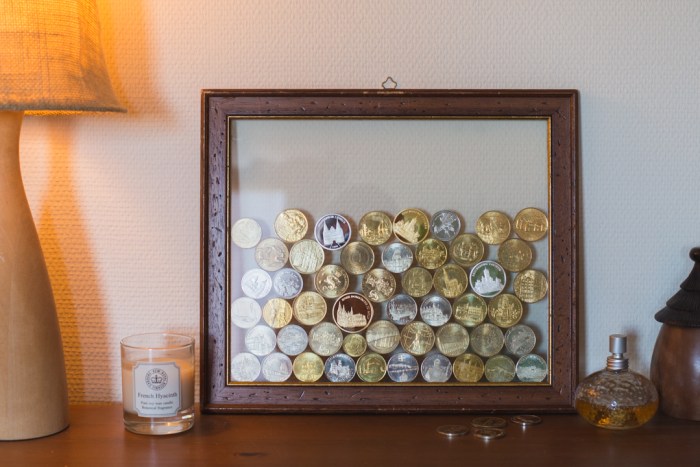
I really like the distressed look of the frame. It’s not an antique but I think it works great with the coins. I don’t like so much the way the coins are at the moment but it’s ok for now because I will have to rearrange them soon!
Hope you like it!
Off I go now! I need to get my cameras ready for a photoshoot I have in Paris!


