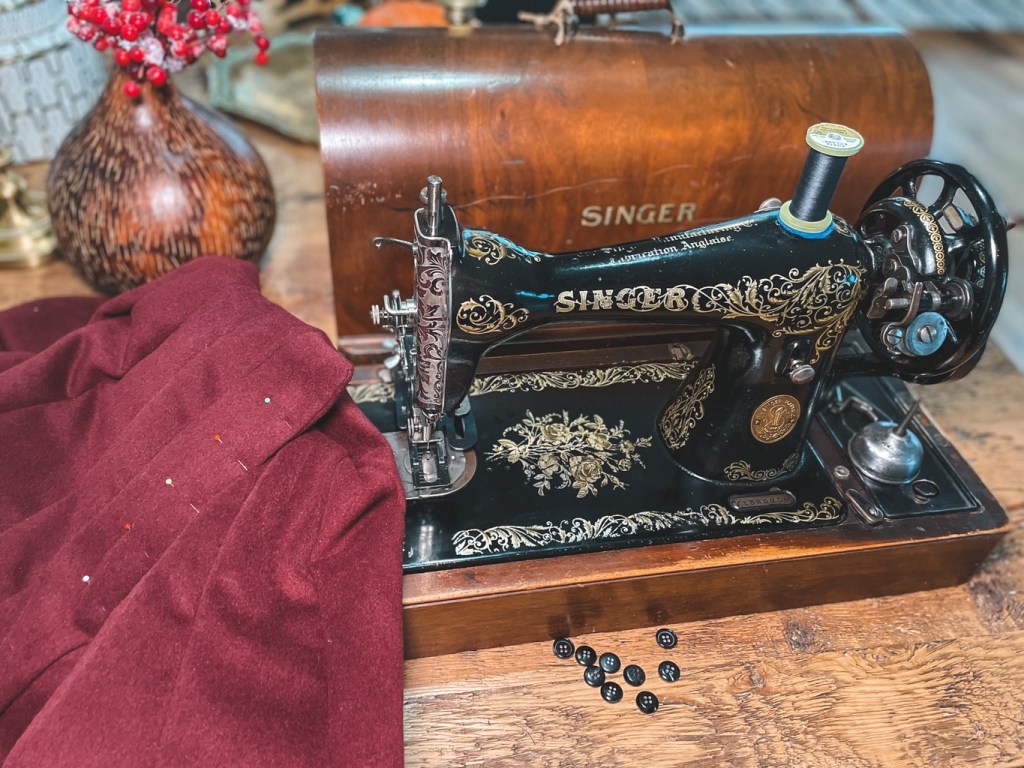
The time has come! I’m finally showing you my Singer Zigzagger in action and in all its glory. This attachment can do so much more than just zigzag, it is simply impressive! And beautiful! Oh, and truly genius!

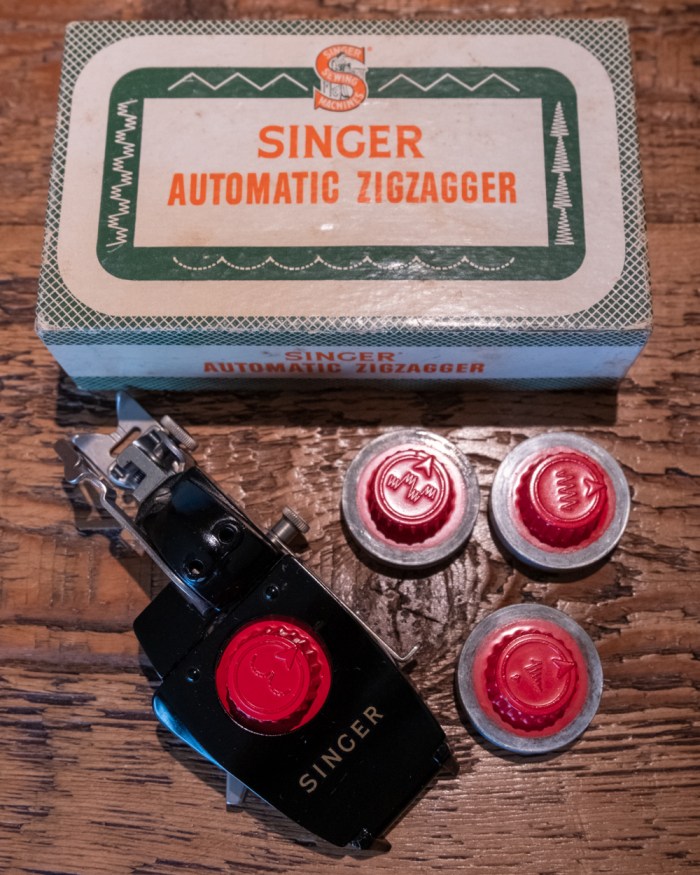
The Singer automatic Zigzagger
Singer attachments are metal bits that are usually mounted in place of the regular presser foot of the machine to perform various tasks. The Zigzagger is amongst the active attachments, just like the buttonholer. But there are many sorts of other fascinating attachments from which, many modern ones derive from. You can check out a full list here.
The magic of Singer attachment comes from their simple genius way of operating!
What is so impressive about such attachments, you may ask?
They solved an issue vintage sewing machine had: being only able to do straight stitches.
How? By making the fabric move! And that is genius if you ask me!
Imagine being a Singer engineer in the mid-20th century. You are tasked with transforming a straight-stitch machine into an all performing machine, without actually changing the machine… or you are fired!? OK, maybe not that last part.
And you come up with the idea of moving the fabric side ways to get the desired result. Sir, you are genius!
I can’t actually confirm that’s how things went but nether-the-less, in 1954, the first zigzagger was created.
They are 3 main different Singer zigzagger:
- The 160985 from 1954 (and 160986 for slant machine)
- The 161102 from 1956 (and 161103 for slant machine)
- The 161157 from 1957 (and 161158 for slant machine)
Those above are the big black ones with cams. They are pretty much all identical and can work on most machines, including featherweight ones.
There are also Swiss made and German made snail like zigzagger. These use disks, not cams like the one above. Same way to operate though.
As you can see on the commercial video down below, these were sold at the time for $14.95! It probably wasn’t cheap but the possibilities were endless, so I can imagine seamstresses rushing to get such a new tool! I got mine, 2 years ago, for €30 which isn’t bad. The snail ones are far more expensive.
How the ZigZagger operates?
Singer ZigZagger uses cams that are inserted into the top to make different stitches. The original ZigZagger was sold with 4 different cams. The regular Zig-Zag, the rounded blind stitch, a domino stitch and the arrowhead stitch. More on this below but you can see what they do on the box design shown above.
There were later additional sets of cams sold. Another red set of 4 cams which apparently later was painted white, a blue set and a yellow one. (more on this here). Such cams were made either of aluminum or a zinc-based alloy but all pretty much look alike except for the top color, the design of the stitch indicated on top of it and the Simanco reference indicated below.
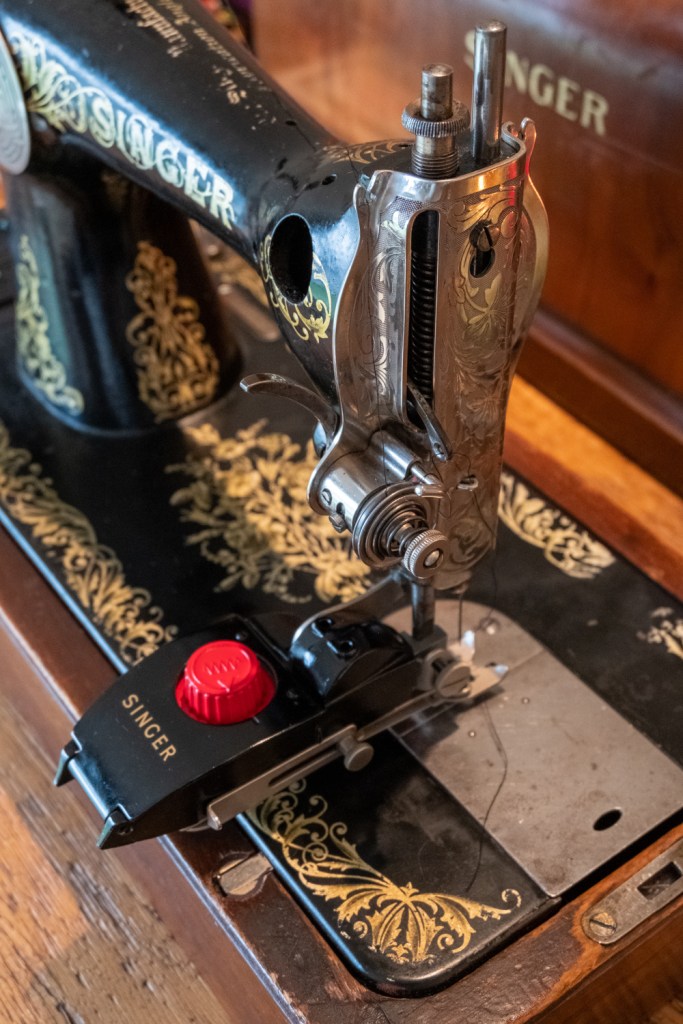
So here is the inside of the beast.
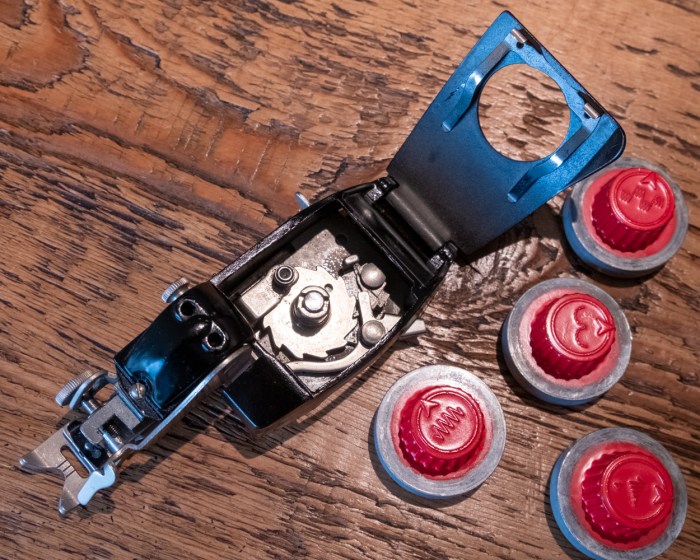
You can see where the cams goes, once the lid is opened.
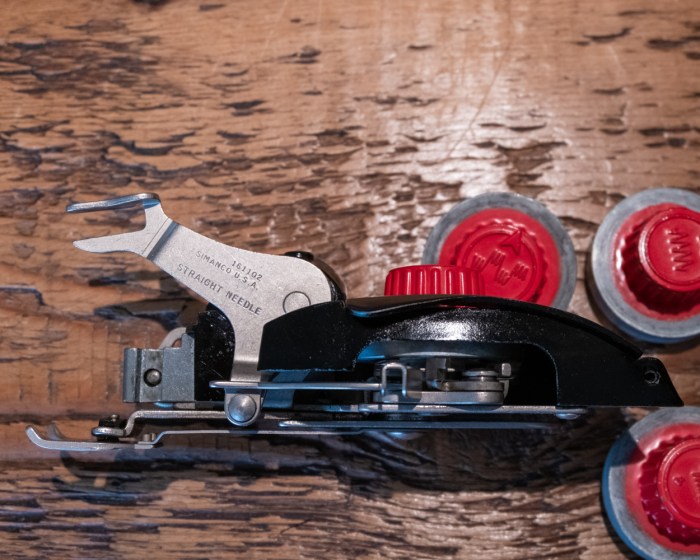
This is the side where the reference of the Zigzagger is indicate on the fork arm that gets attached to the machine needle clamp.
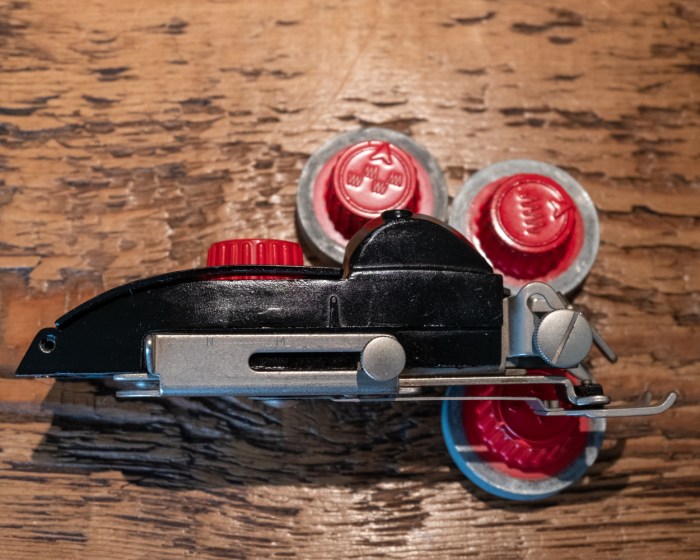
On the other side, you have the bight regulator (quite a weird name!)
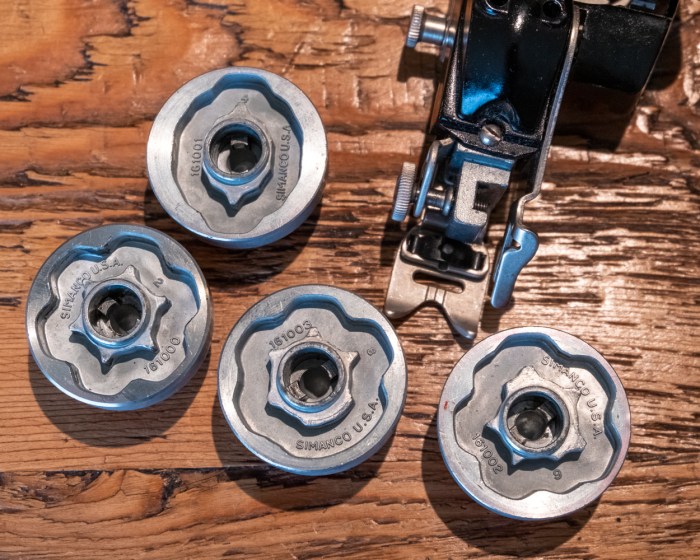
The picture above reveals what the cams look like underneath. As you can see they are all slightly different and this is what creates the different results. Number 2 is the regular zig-zag cam for example. Nb 4 (at the top) is the rounded blind stitch cam, nb 8 (in the middle) is the arrowhead stick and nb 6 or 9 is therefore the domino stitch.
Since I tend to share the most boring video, let me explain the ones below and above!
I wanted to show how the pieces move inside, but these makes things a little confusing actually, because things are slightly different once a cam is on.
In the above, you can see the rotation of the mechanism as the arm fork is raised and lowered. But this isn’t exactly what is happening when the cam is on, as the arm actually ‘jumps’ from one of the central disk dents to the other.
And on the below video, you can see the side movement of the mechanism. But again, when the cam is on, the movement is different and slightly more restricted as the cam is the one dictating the cadence.
So yeah, pretty useless videos!
Here is a picture of the ZigZagger neatly tucked in its box instead!

How to use the Singer ZigZagger
The zigzagger is easy to mount on the machine in place of the regular presser foot.
Oh wait, the below picture is better! In case you were wondering if we were indeed talking about Singer! (#NotAdvertizing!) 😉

Once mounted, and cam in position (arrow on the cam, in front of the side mark), you’re ready to go. Wait really?! Well kind of but not quite. It takes a bit of additional setting to get things going properly. Pressure foot shall be slightly released, to allow the movement of the fabric. Thread tension shall also be slightly less than usual. And then you have to chose the desired bight and stitch size…. and then you pray!
I have found quite a few videos on YouTube of expert seamstresses who have truly mastered the use of such zigzagger. I’m not even close to mastering such instrument!
My trials are messy and I dare to show them to you, in all their glory! For a starter I clearly had the wrong needle on, for such fabric. Then, I have come to realize that my machine operates best in middle grounds. It does like to do super wide stitches, nor super small ones. This is something I’m going to have to investigate at one point or another.
Over all, it takes practice to get the desired result!
Here is simple zigzag in action:
And below another quick video with the rounded blind stitch cam.
Using Singer’s attachment takes a bit of practice
So indeed using such ZigZagger takes a bit, or a lot of practice. Maybe an infinite amount of practice actually! Not quite sure yet.
I have been using the simple zigzag cam extensively actually. Yet, it takes me a while to get the desired result. I have not been using it for any type of decorative work!

As you can see my different test above, it isn’t always glorious! Especially if you compare to the below images which are extracts of the manual that came with the attachment.
Not sure I will ever manage such perfect zigzags!
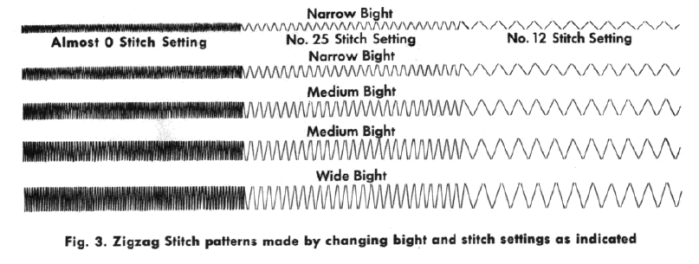
The manual also offers a selection of designs that you could theoretically produce with such attachment… in my dreams only!

Here below, you can see some of the result with the rounded blind stitches cam and the domino stitches cam.
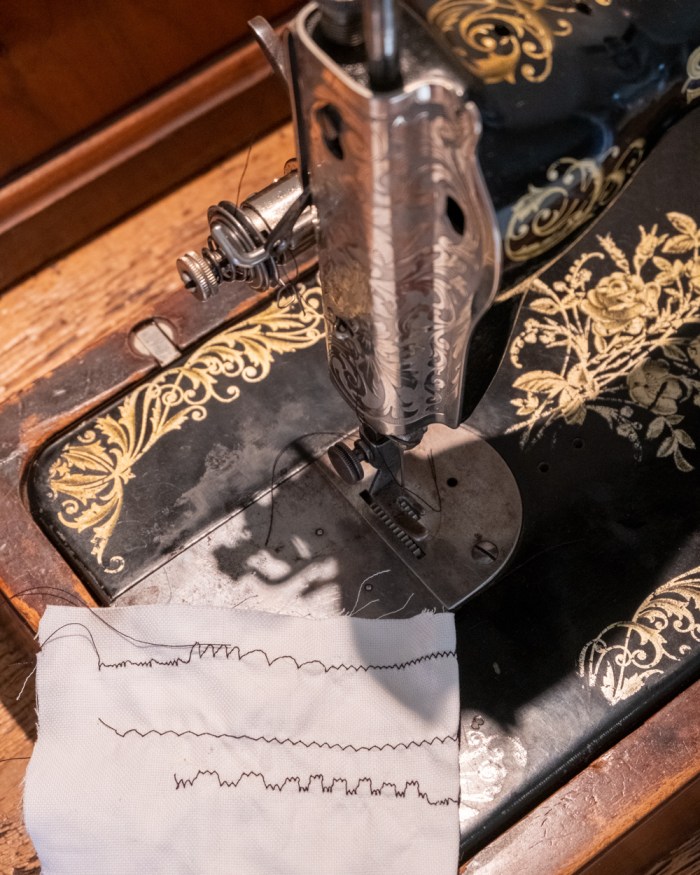
Not terribly bad but this isn’t going to be used to decorate a dress or else, any time soon!

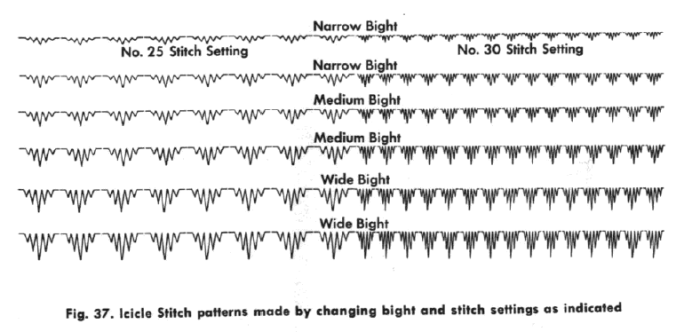
As mentionner above, there are other cam sets that can be purchase separately from the 4 original red ones. I wouldn’t mind getting the icicle one below. But I doubt I would actually manage it! Too bad…
Well, despite my fairly poor results so far, I’m still incredibly impressed by such an attachment. I know it is possible to get amazing results because I have seen them in action. So even if I’m not a master yet, I will keep trying!
Oh, one last thing I should mention is that you can also do straight stitches with these! In case, I suppose you need to alternate stitches in the middle of a project. You just need to bring forward the lever that is on the right side when the cam is at the centered position. (proper instructions in the manual, don’t worry!)
They are truly magical!
If you don’t believe me, do watch the following 1956 TV advertisement for such attachment!
If you read up to here, you may also like my experiment with the magical buttonholer!


I wish I could have this zigzag attachment..♥️-grace from Philippines
LikeLike
Hi,
I have an 1889 Singer treadle and recently purchased this attachment along with 4 other stitching knobs for the zigzagged. However it won’t fit my machine so I have to assume it will only work on an electric singer. I can’t find much information about the specific older machines it will work on. If you have any information please let me know as I was looking forward to using my new attachment and now I can’t. Thank you….
LikeLike
Oh, I’m so sorry to read this. Is your machine a Singer low-shank or a slant shank feet? There were different attachments made for both types. The International Sewing Machine Collectors’ Society (https://ismacs.net) is a good place to start digging into to find information about your machine and your attachments.
LikeLike
Where to buy this attachment through online
LikeLike
eBay is probably your best option
LikeLike
It’s easy too do fun stuff like it
LikeLike
Thank you so much for posting this, I now know what I’m looking for 🤯 I have just brought my 1949 singer treadle sewing machine and was looking through the attachments that came with it, but the original zigzag foot is not complete.💐
LikeLike
Hi, Glad this was helpful & I hope you find what you are looking for!
LikeLike
Your machine is lovely. I enjoyed your zig-zagger demo. Someday maybe I’ll have my own to experiment with. [*Adds to wish list*]
LikeLike
Thank you! And I hope your wish comes true! 🙂
LikeLiked by 1 person