Before I can continue telling you about my sewing adventures, I have to talk about my buttonholer and how I had to repair it!
Why I got a buttonholer in the first place!
A while back, I got a 1923 Singer sewing machine in a thrift store and a love story began. You can read such love story if you wish, it’s funny!
Such sewing machine was hiding some great treasures, in its little drawer.
Amongst the bits and pieces that were stored away, some were obvious tools, like little screw drivers. However, some were mysteries. There were all sorts of metal pieces which I had no clue what they could do. I soon realized by their common feature that, these were attachments, to replace the regular presser foot.
I had absolutely no clue that such things existed! What do they do?
So Google and youTube came to the rescue and I discovered the world of attachments, for vintage sewing machines!
It blew my mind! These were all so smart and so special.
When I decided that I should learn how to sew, there is one attachment I thought I absolutely needed and that was a buttonholer!
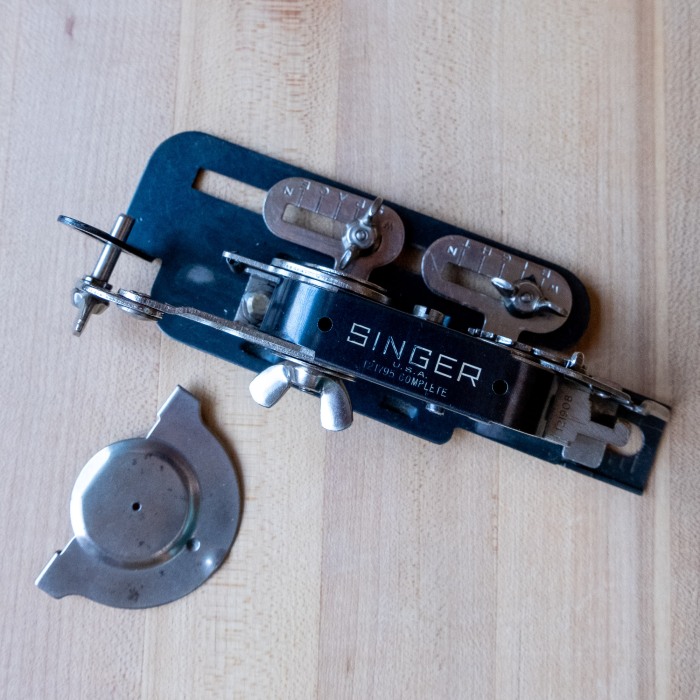
After some time, I found one on Ebay, a Singer buttonholer referenced 121795, dating from the 1940’s and purchased it. The description said it worked.
When I finally received it, my excitement was short lived as I soon realized there was no way it could work. The lever could only move so slightly and with great pressure.
I tried and tried and thought I was going to damage my machine. I was so disappointed.
Cleaning my buttonholer
At one point I noticed some sort of grainy substance coming out of the buttonholer. What is that? Maybe it’s just a bit dirty?
As I saw the little screws on the side, I decided to remove the black cover. Oh, boy!! It wasn’t a little dirty. The inside was half filled with a brownish, solid & smelly substance.
It took me a while to realize that it was 80 years of oil and muck that had solidified. (I forgot to take a picture of what it looked like before)
Disgusting!
So I used the little screw driver to dig into it. And as you can tell on the pictures below, bits by bits, the dirt came out.
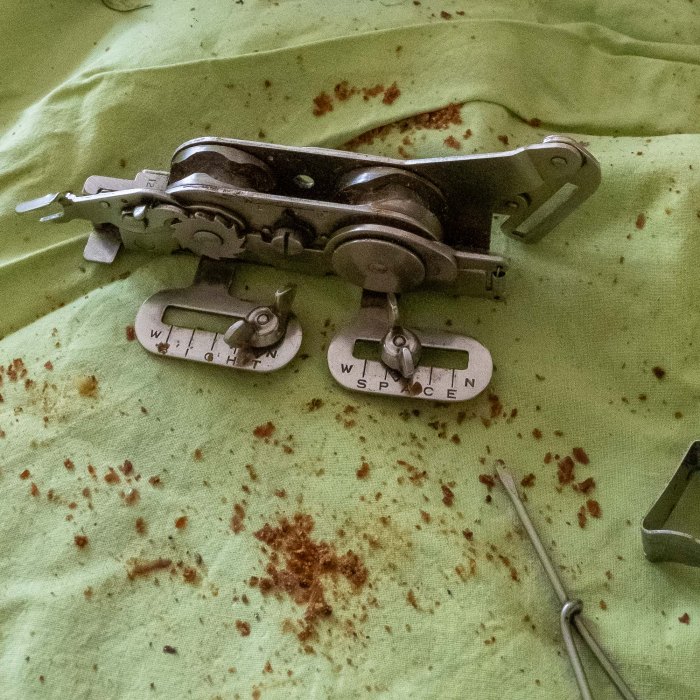
The more I removed, the more the front wheel could move. The lever could go up and down a bit more easily but the back wheel wasn’t turning much.
I bought some non eco-friendly grease remover in my hardware store and dipped the whole thing into it, for a whole day & night. I was getting desperate.
Relief! It came out looking much better! Even the back wheel was moving! Yeah!
I installed it and my first button hole looked terrible! Ok, but there are thread tension adjustments to make… Humm more test and my button holes looked like a flatten S, not like a O.
Pffff & grrrrr!!
Google some more… there’s got to be something out there!
OK, I’m taking it apart!
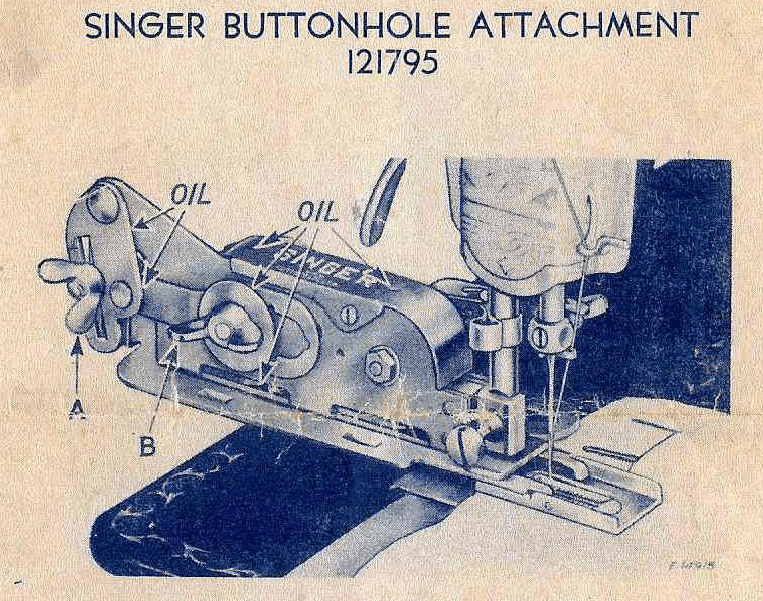
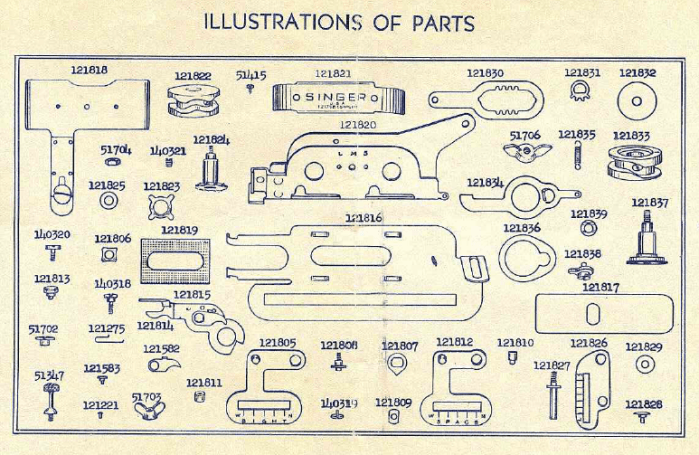
I found the instruction manual. It included the list of parts and it made me realized that my last chance was to take it appart. It is made to be taken appart and repaired when needed, after all. That’s just the way things were.

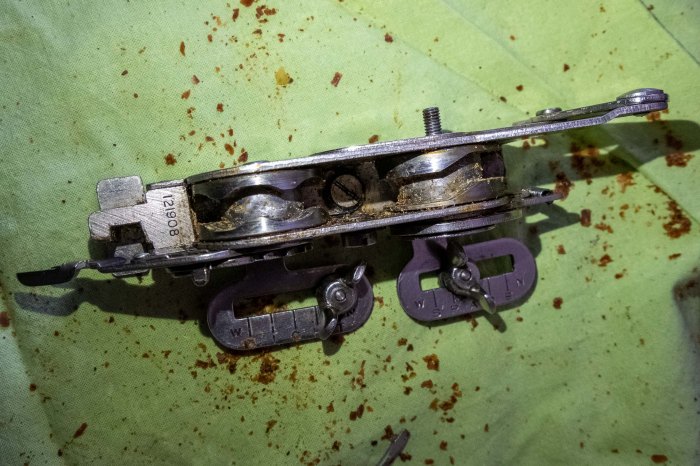
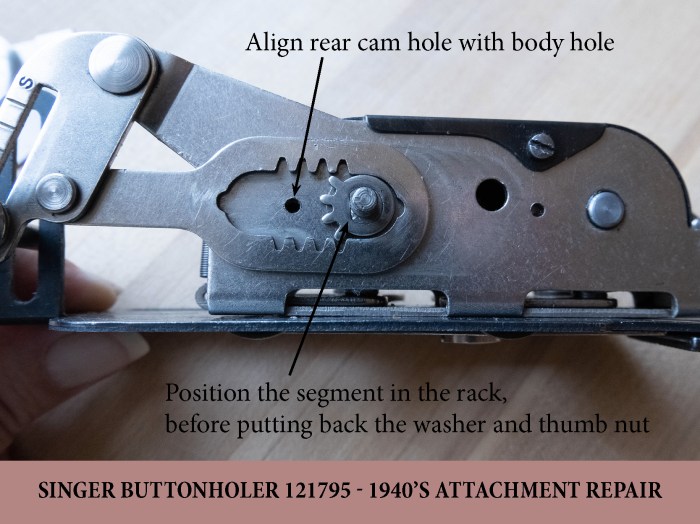
With the manual, I also identified the problem: the rear cam (or the back wheel!) wasn’t aligned properly anymore. Maybe because of all my digging into the muck or maybe, because of age and mistreatment. It created the S shape because it was shifting side in the middle of the buttonhole rather than at the ends. Putting it back into the proper position was the only option.
How to do this? Well actually, that was easy!
Taking it apart was easy. Unscrew, push, unscrew some more… it all comes apart easily. I didn’t remove the little spring because that wasn’t necessary. I did remove the dirt that was still inside.
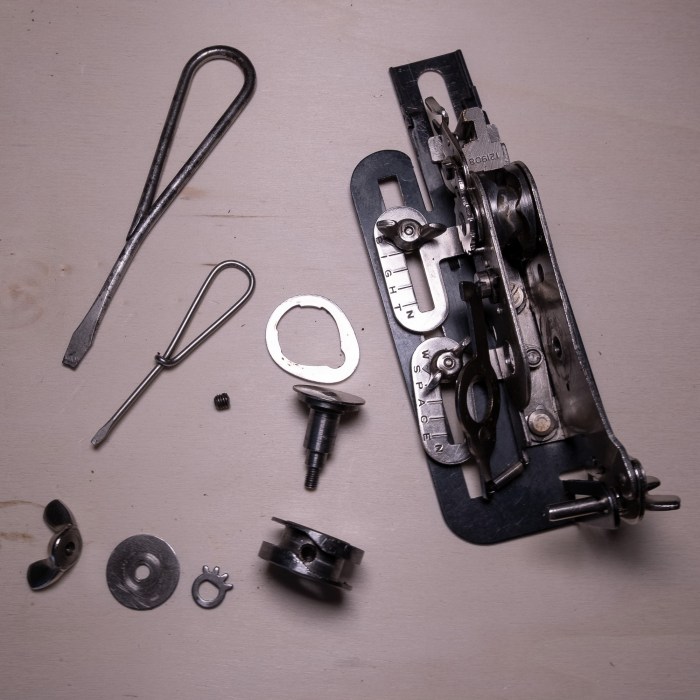
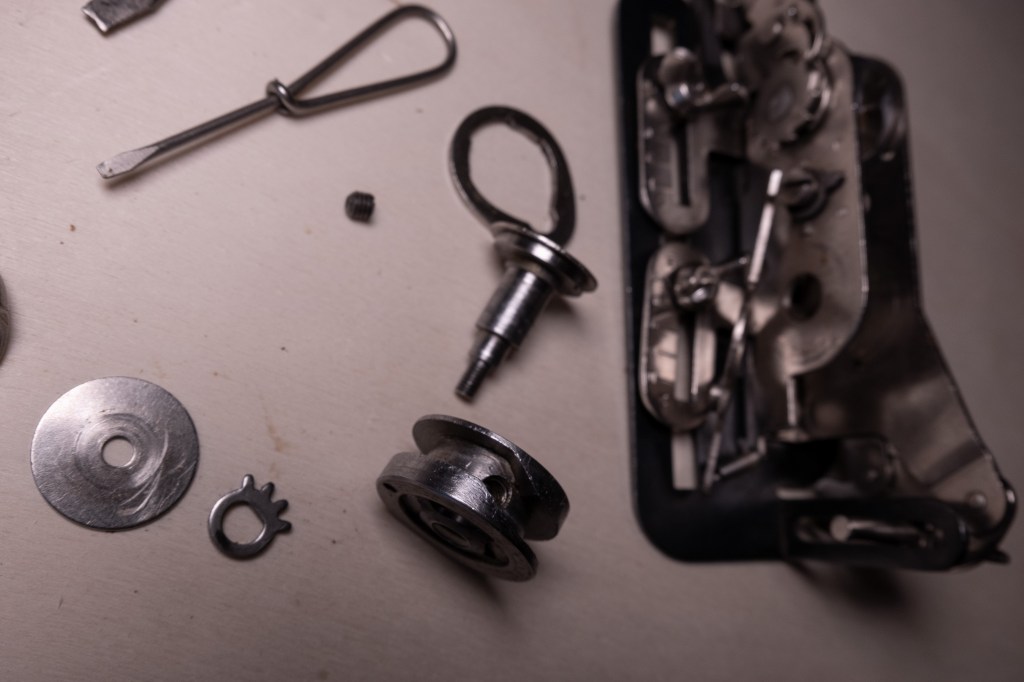
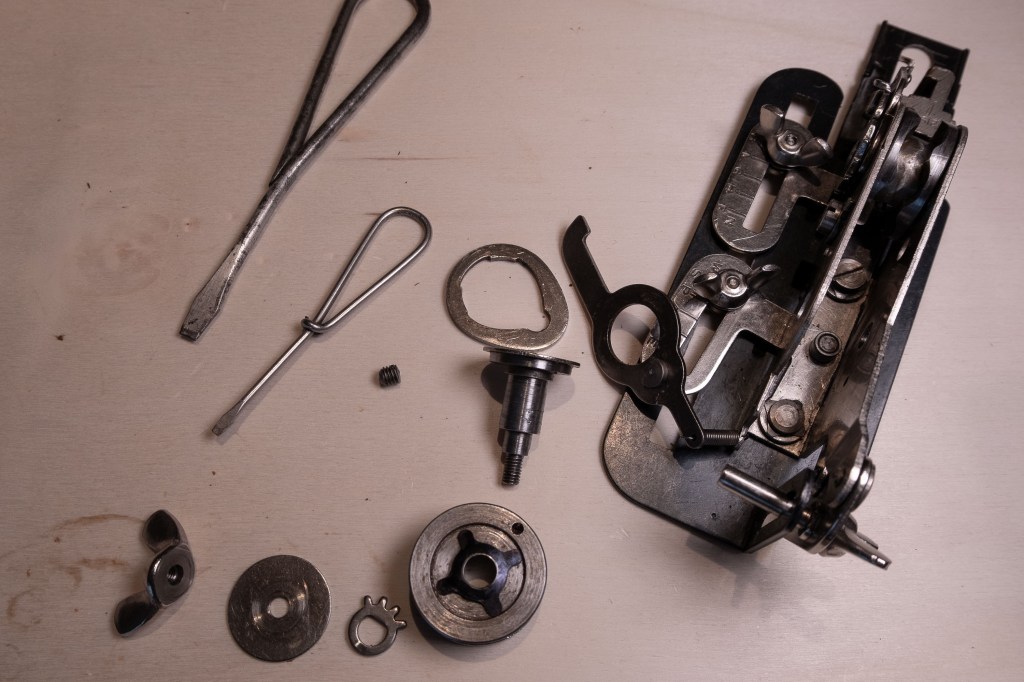
To put it back together with the rear cam properly aligned, here is the trick: As you can see on the pictures above, the rear cam has a little hole on its side. When this little hole is aligned with the little hole in the body of the button holler, it’s in the correct position! See picture below.
I love how this is simple stupid!
And it worked gloriously!!
And I was so happy, at last! 🙂
A couple things you can take out from this
Even if you don’t have a buttonholer to repair!
In the past, things were made to be repaired. It isn’t always easy to repair, it takes some trials and errors, but old things are mostly repairable and built to last. You just have to try.
A lot of things were kind of “simple, stupid“. There were so ingenious too. I mean really! But for every part, there was a right way and a wrong way to install, with little inconspicuous marks, to indicate the right way. It didn’t take a lot of special tools to repair them either.
If I can do it, you can too! Yeah, because I have a lot of determination but I’m not particularly talented!
Not all eBayer are trustworthy! Some do not really know what they are selling so they might misjudge the condition of the things they are selling. Some mislead you intentionally. The seller, I got this buttonholer from, was selling a lot of other sewing related items. The description said it was complete but the cover plate wasn’t deliver with the buttonholer, so I had to get one separately. It isn’t the same as the ones that come with such attachment but it works. All is well at the end but I was truly annoyed!
The fact that not all eBayer are trustworthy is something you probably already knew! I just never had this issue before so I’m a bit more careful now.


