The benefit of using an antique sewing machine can not be understated while taking on such a project!
Long story short, I got a longbow on a medieval market! A dream come true!
It seems I just can’t stop finding ways to have fun or fill my days with new projects.
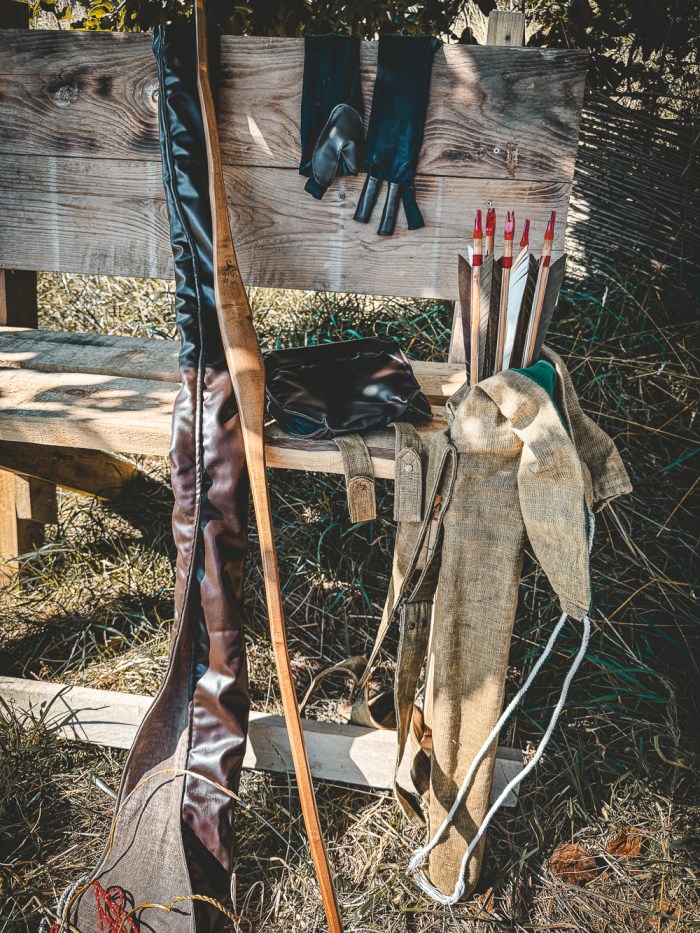
Anyway, right away I knew I wanted to sew my own quiver to hold my arrows and that I would need a bow case to protect my bow when traveling with it.
Now, if you thought a bow and some arrows was all you need to start archery, it’s just because you haven’t yet felt the sting of the arrow flying on your fingers, the painful caress of the string on your arm or the numbness in your fingers, after shooting for a while.
Although I spend more time retrieving my arrows than actually shooting them, I have now felt all of this and so I decided that I also needed to sew my own protective gloves.
Why you may ask?
- Reason number 1: I’m left handed.
- Reason number 2: I’m a woman.
These 2 combined meant that my options to simply purchase gear were limited and what I found in shops and online were ugly. Ok sorry, not all were ugly just mostly not my style!
- Reason number 3: I didn’t want to buy things made out of leather.
Now, you may have read somewhere on this site that I do not usually recommend improvisation as I had specially written:
“Don’t improvise is a basic rule one shall follow whenever trying to cast magical spells, handling a sharp weapon, fiery tools or a sewing machine!
As usual, I didn’t follow my own recommendations and I improvised my way through the whole thing!
Sewing a quiver
I wanted a quiver that I can carry on my back but also attach to a belt should I need to. Lot’s of archers will tell you that drawing arrows from a back quiver is impossible. In my experience it is just a matter of how the quiver is positioned on your back. Maybe shoulder flexibility matters? Although I haven’t been gifted a lot of that, I can still easily draw my arrows when my quiver is on my back.
However, putting them back in the quiver is more challenging, so having the ability to hang it from a belt seemed like a practical idea.
I can’t give you a pattern because I just went along. Total improvisation!

I started by the wood frame. The holes in the top part keeps the arrows slightly apart and prevents the feathers from getting damaged. The top part is about 1cm thick which is enough to guide the arrows and enable them to go straight in. The bottom part is also wood and the arrows slide right in and land on it, preventing damages to the fabric. Two thin wood planks link the top and the bottom, bring sturdiness and guide the arrows in case one really wants to go sideways.
The body of the quiver was then sewed to fit with a wider top part encasing the arrow fletching. I could have made that part a little bigger but it still works.
The difficult part was obviously positioning the straps to make it fit comfortably. It took some trial and errors and some hand sewing as I did this after having sewed the body of the quiver.
Despite the rigid wooden frame, it is now extremely comfortable to wear.
I adore the middle buckle I found on eBay! I am looking for a second buckle to match and have a modern one in place in the mean time.
Oh, and the fabric is waxed to add a bit of protection.

Sewing a bow case
My bow is a longbow which turns out, is a very unpractical thing to carry! Who would have guessed?!
It’s 1,8m or 5 feet 9 and yes, it is taller than me.
To protect my bow I decided to use 3 layers:
- a layer of soft fabric for the inside where the bow goes.
- A layer of thick fabric which is now hidden but feels and acts as a cushion.
- An external layer of faux leather for the look.
I had enough leftovers from other projects for the 2 first layers although I had to cut them and sew them back to the required outrageous length needed. I did have to buy the faux leather.
First I thought my bow case would just a wrap with strings but this proved to be extremely unpractical du e to the length.
After a couple tries, I decided to sew part of it, to make it so only a portion of it stayed opened.
Then I saw more and later even more! So now I just have a 30 cm / 10 inches opening or so and only one string to finish closing it.
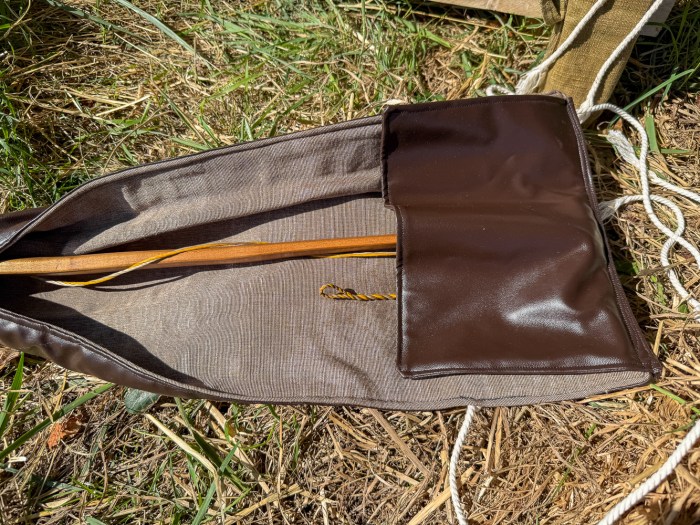
The bow slides in and out easily and it’s much easier to use than my original plan. With the flat at the top which I had to redo to make it bigger, the bow stays in without any problem.
The next stage now is to find a way to carry it on my back, without knocking down everything on my way and still passing thought doorways. Not a small challenge!
Ultimately, I think I want to be able to attach it to my quiver but I’m just not sure how yet.
And now…
If you’ve ever looked into archery, you may have noticed that archers have the weirdest gloves!
A glove with 2 or 3 fingers on one hand, the one drawing the string, and a glove with a thumb and an index finger, on the hand holding the bow. Really weird looking but once you try them on, it just makes sense.
Sewing my archery gloves: My bow glove
I love it already!
For this glove, I recycled a pair of yoga pants. They were mostly cotton but with a bit of a stretch. While the top part was ruined, the leg parts were still good and had the required width.
I drew my hand with chalk and voila!
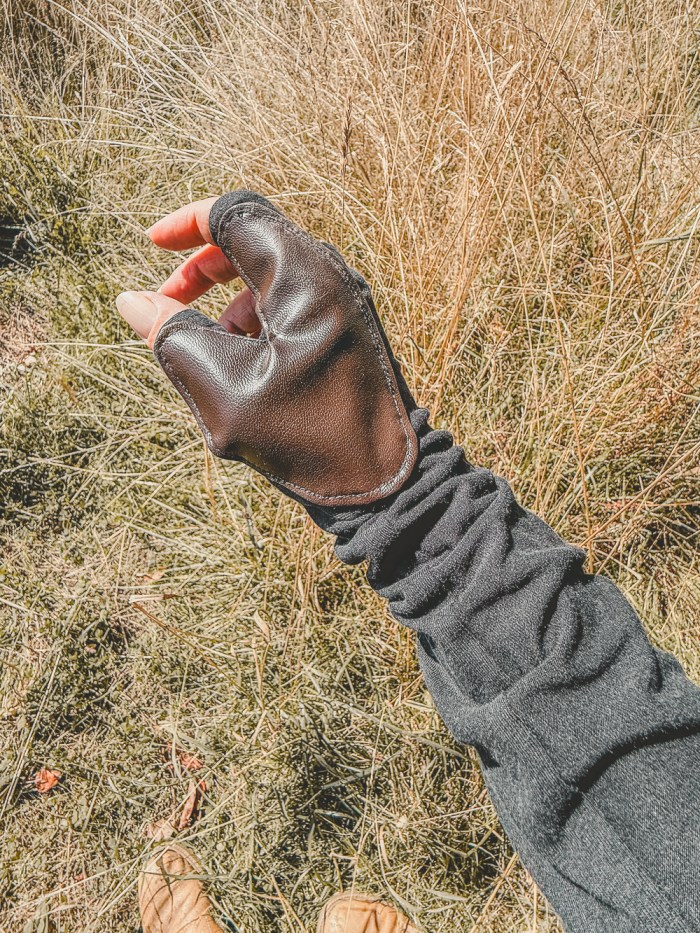
Although, I can’t explain what happened with the part inside the hand (which you can’t see in the picture anyway!). I was basically constructing it on my hand at that point and for some reason, I ended up with an extra bit so I kept it. And it turns out that not only it doesn’t bother me at all but I enjoy the double layer when holding my bow!
I added some of my vegan leather on the index finger and thumb and voila!
I love it! Did I say that already?
Sewing my archery gloves: My 3 fingers glove
My first prototype was made of the faux leather from an old pair of boots. The foot part was ruined but the leg part was still ok, or so it seemed. I even kept the tight and snap button to close the part around my wrist.
It didn’t go well.
So after I had sewn my bow glove, I decided to do a new one.
I use the other leg of my old yoga pants for that, some felt to cushion the finger and my vegan leather.
And I like it! (it’s not yet love, but who knows?!)

The fingers are a little too long and they tend to slide out so it is not perfect but it does protect my fingers and it’s the most important. Oh, and I can still use my phone in-between arrows without taking the glove off!
If you are considering sewing yours, try to add something on the top of your hand which holds the fingers back.

What’s next?
As mentioned above, I need to find a matching buckle for my quiver and find a way to attach my bow case to such a quiver. I also have to finish the little pouch I created to carry my things around. I’m missing a way to close it.
But of course, I have something else in mind!
We’ve all heard about the Amazons cutting off one breast to better use their bow. Well, I’m not about to do that but let’s say I understand the issue! So my next project will be a sort of corset for sure.
What does it have to do with my antique sewing machine?
My Singer sewing machine is from 1923 and is now an antique! It is a beautiful piece of equipment which never shies away from hard word and has incredibly sewn every silly ideas I have, no matter what.
In this project, and maybe especially the bow case, it has sewn triple layers of heavy fabrics without any hesitations. Double that? No problem! I was scared and then I was impressed.
Hence the foreword statement that the benefit of having an antique sewing machine can not be understated while taking on such a project!
They are cheap, strong, incredibly reliable and can do things modern machine would probably have issues with.
Onto my next project(s)! What are yours?