These are the tools I wish I had sooner and if you’re starting on your sewing journey, don’t be like me. Get the right equipment. You may improve much faster than I have!

By now, we have clearly established 2 things: I absolutely love my sewing machine and I’m (still) not very good at sewing!
If it is your first time here, first: welcome! Second: you may refer to my very few sewing posts to better understand the situation we are in. If you don’t want to, that’s ok. Here is another picture of my gorgeous machine:
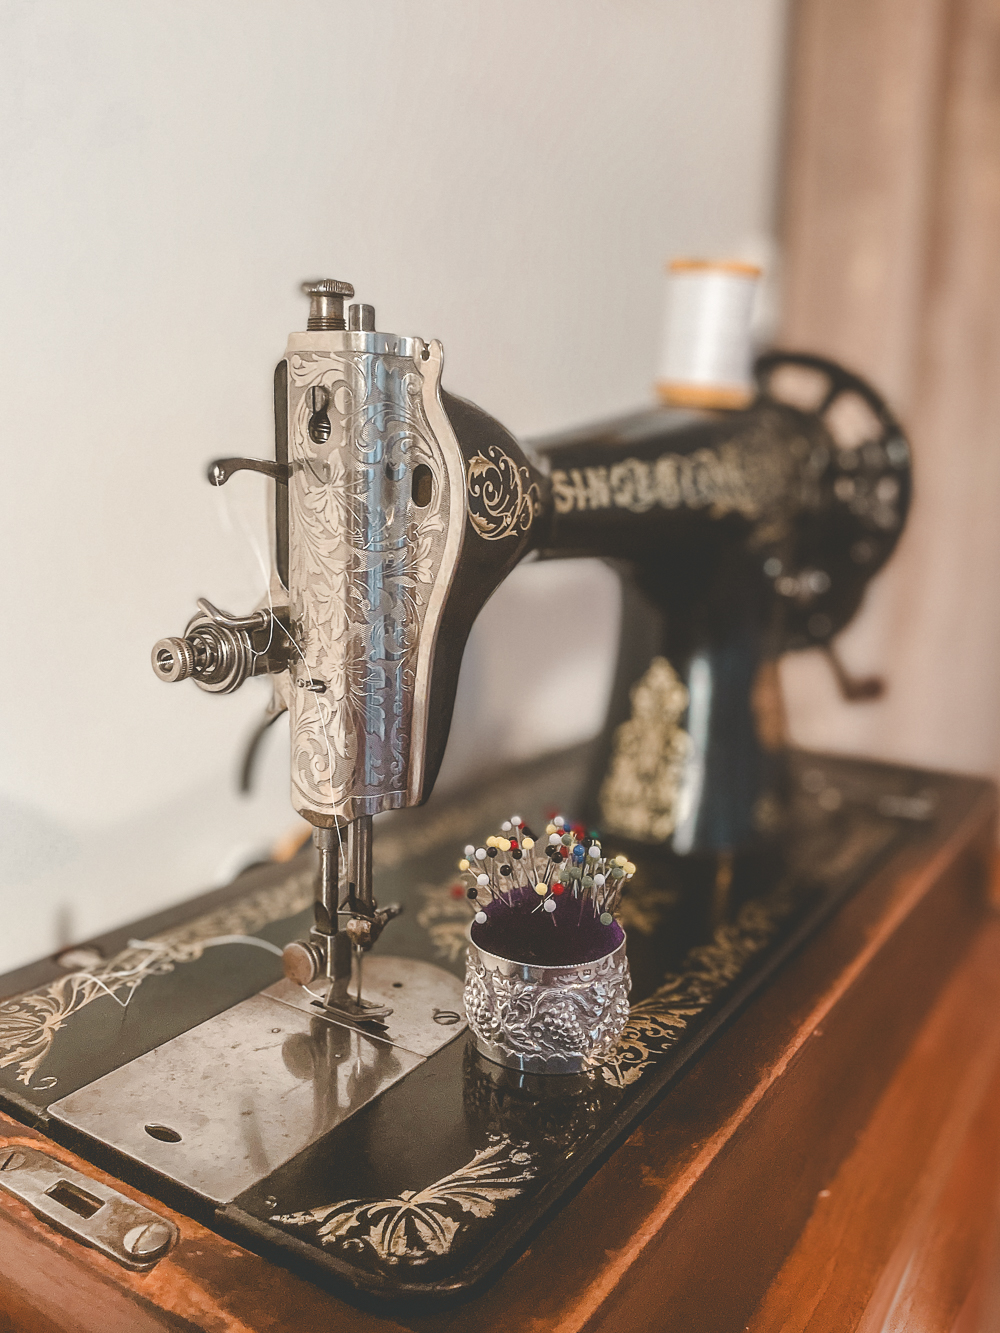
This absolute beauty is a Singer 29K from 1923. Yes, this marvel is now officially an antique and it works so wonderfully. In no way can she be blamed for any of the troubles I get when sewing. The faults are all mine: I’m just not (yet) a good seamstress!
Still, one may see a glimmer of hope as I may have slightly improved! Obviously this statement is entirely a matter of perspective and admittedly I have very little ways to prove it! Nevertheless, I believe I have and this is what matters.
So today I wanted to tell you about the tools that helped me improve and how these have helped.
If you are an experienced seamstress, don’t scroll down, you’ll laugh at how obvious these are!
Others may proceed.
Please first note that this post contains Amazon affiliated links. If you decide to make a purchase, I might get a commission at no extra cost to you.
Ironing is part of sewing and I had to accept this!
I’m starting here with probably the hardest thing I had to accept. I just hate ironing and I was almost convinced I could sew without ironing. I was often just pressing with my hand! Yep!
Now? I iron my fabric before cutting and I even iron my seams, when required. And yes, it makes a huge difference! Obviously!
I know, I know, I was stupid and ridiculously stubborn.
Now I can’t recommend an iron per se. I’m just using the one I have. If I needed to get a new one, I would probably go for one with a vintage look but with the modern features like steaming.
Use what you have but iron!!

I wish I could use this iron but alas the one I use is just a modern one.
Sewing scissors cut better, it’s just a fact
Honestly, I had no clue how much of a difference getting a nice pair of scissors would make. I used to use regular scissors to cut my fabric and let’s just say that the results were very often far from ideal. And when you don’t cut straight, you don’t sew straight! It’s just like that.
Sometimes you need to learn the hard way!
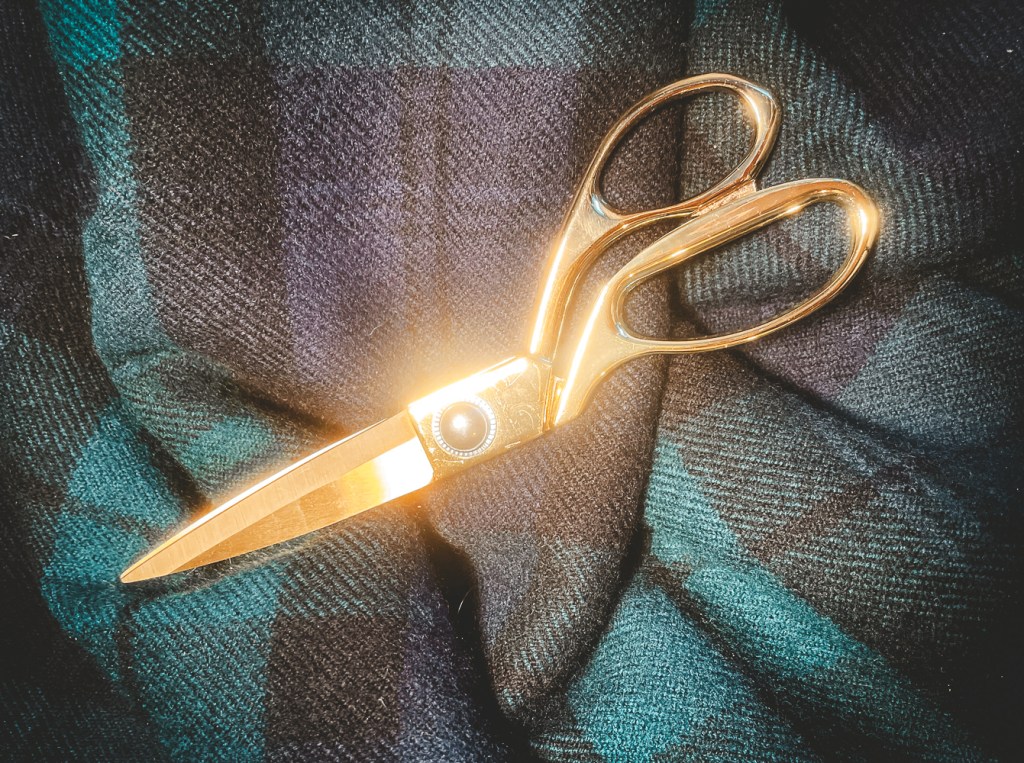
A pair of embroidery scissors is also super helpful for the precise cuts, the tiny cuts, the little tread to snip, the tangled mess to remove.
A seam ripper!
Oh believe me, this is another ‘must have’ and I know because I use my seam ripper way too much.
Raise your hand if you’ve never sewn a sleeve the wrong side out! Or any other part of a garment. I have, so many times that I should probably be ashamed to say it.
One of the issue I still have is that for a lot of fabrics, I don’t know how to recognise the right side of the fabric. When there is a print, it is easy, but most of the things I sew are solid colours. Often it looks ok, I sew 2 pieces together and then I look at them again and realise my mistake. It’s annoying, it’s frustrating!
But at least the seam ripper makes it fairly easy to undo the seam without damaging the fabric which is very important.
A retractable sewing tape measure
Measure, measure and measure again! This has helped me improve my results.
On the last garment I sew, my armholes were of identical size and my sleeves symmetrical and both the same distance from the neck hole! That is indeed progress, with a bit of luck maybe.
A retractable sewing tape measure is a tiny investment with a huge impact! No, your measuring tape doesn’t need to be retractable but for me it has been easier to use, so that’s what I recommend.
Various needles
This will sound silly, but I had never realised until recently how much of a difference using the right needle makes. I had broken one, so I replaced it by another one I found in my little needle box and whoa!
I cursed myself that day for not thinking about it sooner. (despite reading about this numerous times of course!)
I’m still not really good at changing the needle every time I change fabric but I’m thinking about it more and more! I have lots of room for improvements still. 🙂
In case you wonder, I confirm that you do not need antique needles to sew with an antique or vintage sewing machine. Regular brand new needles fit my machine so if you have an old Singer, my guess is that they would fit yours as well. Check the shank of your needle and length and you should be good!
A pin cushion is such a time saver
Honestly, I had no idea how much my pin cushion would change my sewing process! Thinking back, it’s ridiculous how much time I spent gathering pins. They would go everywhere. On the floor, behind my machine, inside my machine… These little suckers would go hide under my bed and my partner complained a couple times because he found one in the vacuum cleaner. oops!
Since I have my pin cushion, which isn’t a very long time, I can report that my fingers are also happier as I just don’t prick myself as often.

You won’t easily find a gorgeous pin cushion like mine! Maybe on Ebay or Etsy but these will cost you a bunch. Fear not, I shall show you soon how to make your own!
And that’s it really. These are all the things I really use and which have improved my sewing results.
Jokes on my poor track record aside, I think it’s important to start with the right tools. Not the most expensive tools or complicated ones, just the basics really. It truly helps.
Let me know in the comments below how it goes for you and what helped you most.


